Understanding the ResMed AirSense 10
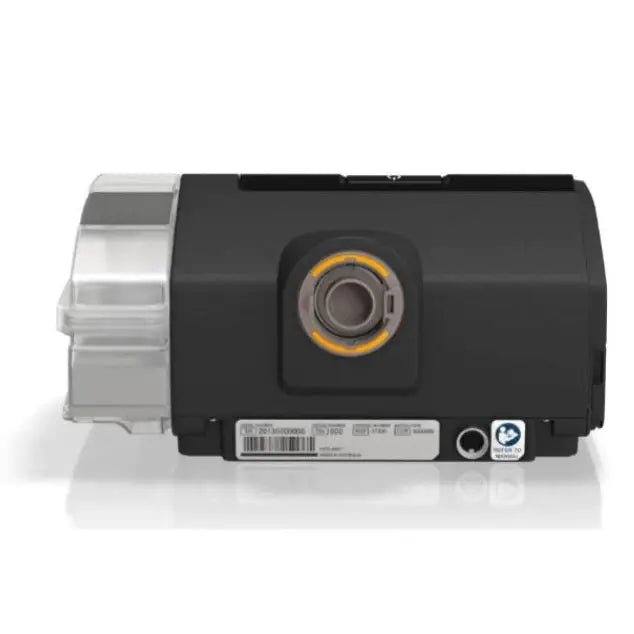
The ResMed AirSense 10 is an auto-adjusting CPAP device designed to meet individual needs by automatically adjusting air pressure levels throughout the night. This feature ensures that users receive the optimal pressure required to keep their airways open, improving the effectiveness of sleep apnea therapy.Key Features
Auto-adjusting CPAP: Automatically changes pressure levels based on real-time data for optimal therapy. Integrated Humidifier: Reduces dryness and irritation with consistent humidification. Bluetooth Connectivity: Enables easy data transmission to healthcare providers for monitoring and adjustments.Managing Sleep Apnea Symptoms
The device helps users by: Monitoring Breathing Patterns: Detects and responds to changes in breathing, adjusting pressure levels as needed. Data Tracking: Bluetooth connectivity allows users and healthcare providers to track therapy progress and make necessary adjustments.Integrated Humidifier and Bluetooth Benefits
Humidity Control: The built-in humidifier can be adjusted to meet personal comfort levels, alleviating common side effects like dry throat or nasal passages. Remote Monitoring: Bluetooth connectivity enables easy sharing of therapy data with healthcare providers for timely interventions and personalized treatment plans. These features make the ResMed AirSense 10 a powerful tool in effectively managing sleep apnea.The Importance of Correct Pressure Settings in Sleep Apnea Treatment
CPAP pressure levels are crucial for the success of sleep apnea therapy. These levels, usually measured in centimeters of water pressure (cmH2O), range from 4 cmH2O to 20 cmH2O. Most therapeutic settings fall between 6 cmH2O and 14 cmH2O, with an average around 10 cmH2O.Why Consult a Healthcare Provider?
It's important to consult a healthcare provider to determine the right pressure settings for you. This professional evaluation takes into account: The severity of your sleep apnea How you respond to therapy Your personal comfort levels Without this guidance, you might end up using pressure settings that don't effectively relieve your symptoms.The Consequences of Incorrect Pressure Settings
Using the wrong pressure settings can lead to serious problems: Discomfort: Too much pressure can cause discomfort or even disturb your sleep. Ineffective Therapy: Insufficient pressure won't keep your airway open, making the therapy useless. Air Leaks: Improperly adjusted settings can cause air leaks around the mask, reducing treatment effectiveness.The Bottom Line
It's essential to ensure that your CPAP device is set to the correct pressure in order to get the most out of your treatment and stay comfortable throughout the night.Accessing the Clinical Menu on Your ResMed AirSense 10
Step-by-Step Instructions for Accessing the Clinical Menu
Changing the pressure settings on your ResMed AirSense 10 requires access to the clinical menu. This menu is designed for healthcare professionals, but you can access it following these steps: Ensure the Device is On: Begin by making sure that your ResMed AirSense 10 is powered on and displaying the Home screen. Simultaneously Press Buttons: Press and hold both the Home button and the dial knob at the same time. These buttons need to be held down for approximately three seconds. Entering the Clinical Menu: After holding the buttons, you will see a new screen appear, indicating that you have successfully accessed the clinical menu.Detailed Instructions on Button Usage
Home Button: Located on the front of your device, this button typically returns you to the main display. Dial Knob: Found adjacent to the display screen, this knob allows you to navigate through menus and make selections by turning and pressing it.Troubleshooting Tips
If you encounter difficulties accessing the clinical menu, consider these troubleshooting tips: Verify Button Press Timing: Make sure you are pressing both buttons simultaneously and holding them long enough (at least three seconds). Check Device Status: Ensure that your device is not in sleep mode or turned off. Firmware Updates: Sometimes, firmware updates may change button functions. Check if your device needs an update. Consult User Guide: Refer to your ResMed AirSense 10 user guide for additional instructions or troubleshooting advice. By following these steps, you can confidently access the clinical menu on your ResMed AirSense 10 to adjust pressure settings as needed.Adjusting Pressure Settings on Your Device
To modify your prescribed pressure levels within the clinical menu of the ResMed AirSense 10, you first need to access the clinical menu. This involves pressing and holding both the Home button and the dial knob simultaneously until the clinical settings menu appears. Once inside, navigate through the options to locate the pressure settings. The pressure levels in a CPAP machine are measured in centimeters of water pressure (cmH2O). This unit indicates how much air pressure is being delivered by the device to keep your airway open during sleep. Understanding cmH2O is crucial for effective therapy delivery because it directly impacts your treatment's effectiveness.Recommended Pressure Ranges for Optimal Therapy Effectiveness
Common CPAP pressure settings prescribed by healthcare providers usually range from 6-14 cmH2O, with an average setting around 10 cmH2O. However, these numbers can vary based on individual needs and responses to treatment: 6-8 cmH2O: Typically for mild sleep apnea or for users who experience discomfort with higher pressures. 9-12 cmH2O: Common range for moderate sleep apnea. 13-14 cmH2O: Often prescribed for severe sleep apnea cases. Your specific requirements might differ, making it essential to regularly consult with your healthcare provider to ensure optimal settings. Individual variability plays a significant role in determining the right pressure setting. Factors such as body weight, nasal obstructions, and overall comfort can influence the effectiveness of a particular setting. Customizing your device according to your unique needs ensures a more comfortable and effective therapy experience. Understanding how to locate and adjust these settings empowers you to take control of your treatment while maintaining open communication with your healthcare provider ensures that any changes made are beneficial and safe. This balance helps achieve a more personalized approach to managing sleep apnea effectively.Utilizing Expiratory Pressure Relief (EPR) Feature for Enhanced Comfort During Therapy Sessions
The Expiratory Pressure Relief (EPR) feature in the ResMed AirSense 10 is designed to enhance comfort during therapy sessions. By reducing air pressure during the exhalation phase of breathing, EPR makes it easier for you to breathe out against the continuous pressure provided by the CPAP machine.Customizing EPR Settings According to Your Preferences
Personalizing your EPR settings according to your comfort preferences is key for a pleasant and effective therapy experience. Here are some steps and tips to guide you: Access the EPR Settings: Navigate to the "My Options" menu on your ResMed AirSense 10. Select "EPR" and choose between Off, 1, 2, or 3. These numbers represent different levels of pressure relief: higher numbers provide more relief. Importance of Personalization: Tailoring EPR settings ensures that you receive just the right amount of relief during exhalation without compromising the effectiveness of your therapy. Comfort varies from person to person; what works for one user might not work for another. Testing Different Levels: Spend a few nights testing different EPR levels. Start with EPR set to Off and gradually increase to find which level feels best for you. Monitor your sleep quality and comfort closely during this period. Adjust as Needed: If you feel discomfort or notice a decrease in therapy effectiveness, readjust your settings. Consult with your healthcare provider if you’re unsure about what adjustments to make.


