Step-by-Step Guide to Setting Up Your ResMed AirSense 11
1. Preparing for Setup
Setting up your ResMed AirSense 11 CPAP machine correctly is crucial for effective sleep apnea treatment. Before diving into the setup, ensure you have a clear understanding of the initial preparation steps.Choosing a Stable and Level Surface
- Select a flat and stable surface for placing your CPAP machine.
- Avoid areas prone to knocks or movements that could disrupt the machine’s stability.
Ensuring Proper Ventilation Around the Machine
- Place the machine in an area with good ventilation.
- Ensure there are no obstructions around the air intake and exhaust vents.
- This helps prevent overheating and ensures smooth operation.
Gathering All Necessary Components for Setup
Before starting, make sure you have all the components:- ResMed AirSense 11 CPAP machine
- Power cord
- Air tubing
- Humidifier tub
- Mask (e.g., AirFit F20 Full Face Mask)
- Distilled water for the humidifier
2. Placing the Machine
Finding a Suitable Location for the Machine
- Choose a bedside table or nightstand that is close to your sleeping area.
- Ensure the surface is stable and level to prevent any tipping or sliding.
Positioning the Machine Correctly on the Surface
- Place the ResMed AirSense 11 CPAP machine on the chosen surface.
- Ensure there is sufficient space around the machine for proper ventilation and to avoid overheating.
Ensuring Easy Access to Controls and Display
- Position the machine so that you can easily reach its controls and view the display without having to move it frequently.
- Keep in mind that you will need easy access to key components such as the power cord, air tubing, and humidifier tub.
3. Connecting Power Cord
Setting up the ResMed AirSense 11 CPAP machine involves connecting several key components, including the power cord:- Locating the power cord port on the machine: The power cord port is typically found at the back of the ResMed AirSense 11. Look for a small, round socket designed to fit the power plug securely.
- Inserting the power cord securely into the port: Carefully align the plug with the port and push it in until you hear or feel it click into place. This ensures a stable connection and prevents accidental disconnection during use.
- Connecting the other end of the power cord to a power source: Plug the other end of the power cord into a nearby electrical outlet. Make sure it's a reliable power source to avoid interruptions.
4. Attaching Air Tubing and Humidifier Tub
Setting up the ResMed AirSense 11 CPAP machine involves several key components: the power cord, air tubing, and humidifier tub. Here are the steps to attach the air tubing and humidifier tub:Identifying Connections
- Air Tubing Connection: Locate the air outlet on the back of the machine.
- Humidifier Tub Connection: Find the slot designated for the humidifier tub at the side of the machine.
Attaching Air Tubing
- Connect one end of the air tubing to the air outlet on the device.
- Attach the other end of the tubing to your CPAP mask. Ensure a snug fit to prevent any air leaks.
Installing Humidifier Tub
- Insert the humidifier tub into its designated slot until it clicks into place.
- Make sure it is securely attached and properly seated to avoid any water leakage.
5. Filling Water Tub
The ResMed AirSense 11 CPAP machine setup includes an important step: filling the water tub. Properly filling the water tub ensures effective humidification, which can greatly enhance your comfort during therapy.Locating and removing the water tub from the machine
- Find the water tub compartment on the side of your ResMed AirSense 11.
- Gently slide out the water tub from its slot.
Filling the water tub with distilled water up to the recommended level
- Only use distilled water to fill the tub, as tap or mineral water can cause mineral build-up.
- Fill the tub up to the maximum fill line indicated on the side of the tub.
Reinserting the filled water tub into its slot on the machine
- Carefully reinsert the filled water tub back into its designated spot.
- Ensure it is securely in place, as improper placement can lead to leaks or malfunction.
6. Connecting Tubing to Mask
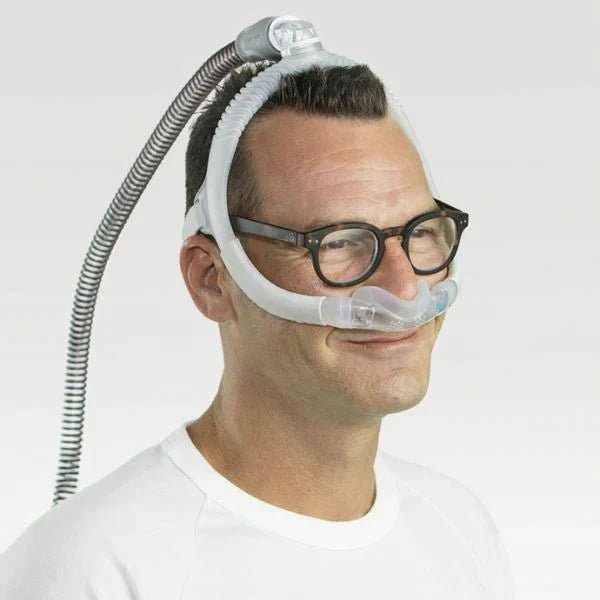
Setting up your ResMed AirSense 11 CPAP machine involves several crucial steps, and one of them is connecting the tubing to your mask. Follow these steps for a hassle-free setup:- Identifying the tubing connection point on the mask: Examine your mask carefully to locate the spot where the tubing attaches. Typically, this point is at the front or bottom of the mask. If you are using a specific mask like the Airtouch N20 Memory Foam Nasal Mask, ensure you identify the connection points accurately.
- Connecting the tubing securely to the mask: Once you've identified the connection point, attach one end of the air tubing to this spot. Make sure it fits snugly without any gaps.
- Ensuring a tight seal between the tubing and mask: A secure connection is critical for effective therapy. Double-check that there are no air leaks by gently tugging on the tube and observing if it stays firmly attached.
7. Personalizing Settings
Personalizing the settings on your ResMed AirSense 11 CPAP machine ensures optimal comfort and effectiveness. Here are key components to adjust:- Ramp Time: This setting allows the machine to start at a lower pressure and gradually increase to the prescribed level. It helps you fall asleep more comfortably.
- Pressure Relief: Adjusting this can make exhalation easier by reducing the pressure during breaths out.
- SmartStart: With this feature enabled, the machine begins therapy automatically when you take a breath while wearing the mask.
- SmartStop: This setting stops therapy when you remove your mask.
- Press the home button.
- Use the navigation buttons to find and select "My Options."
- Adjust each setting according to your preference.
Maintaining Your ResMed AirSense 11 for Longevity and Performance
Regular cleaning and maintenance are crucial for the ResMed AirSense 11 to function optimally. A well-maintained machine ensures:- Prolonged lifespan of the device
- Consistent performance and effective treatment
- Reduced risk of infections or respiratory issues
Recommended Cleaning Procedures
To keep your ResMed AirSense 11 in top condition, follow these recommended cleaning procedures:1. Daily Cleaning:
- Mask and Tubing: Clean with warm water and mild soap. Rinse thoroughly and air dry.
- Humidifier Tub: Empty any remaining water, rinse with warm water, and air dry.
2. Weekly Cleaning:
- Air Filter: Check for dust build-up. If necessary, rinse under warm water and let it dry completely before reinserting.
- Machine Surface: Wipe down with a damp cloth to remove any dust or dirt.
3. Monthly Cleaning:
- Deep Clean: Soak mask parts, tubing, and humidifier tub in a solution of one-part vinegar to three-parts water for about 30 minutes. Rinse thoroughly and air dry.
Frequency of Cleaning and Maintenance Tasks
For best results, adhere to the following schedule:- Daily: Clean mask, tubing, and humidifier tub.
- Weekly: Inspect and clean the air filter; wipe down the machine surface.
- Monthly: Perform a deep clean on all removable parts.
Conclusion
Setting up your ResMed AirSense 11 CPAP machine correctly is crucial for effective sleep apnea treatment. By meticulously following each step, you ensure the device operates at its best, providing you with the restful night’s sleep you deserve.- Enhanced Sleep Apnea Treatment: With a properly set up AirSense 11, you can look forward to improved sleep quality and overall health.
- Personalized Comfort: Adjusting settings like ramp time, pressure relief, SmartStart, and SmartStop tailors the therapy to your specific needs.


